As the holiday season twinkles on the horizon, what better way to sprinkle a bit of festive cheer than with a delightful Brownie Pinecones Recipe? These adorable treats are not only a feast for the eyes but also pack a punch of chocolatey goodness, making them a perfect addition to any holiday gathering. In this guide, we’ll walk through everything from the basic ingredients to the nitty-gritty of crafting your very own brownie pinecones. So, grab your apron, and let’s dive into this fun and festive culinary adventure!
Overview of the Brownie Pinecones Recipe
Ah, the Brownie Pinecones Recipe—a true marvel of the dessert world! These little gems are as fun to make as they are to eat. Crafted from simple ingredients and requiring just a dash of creativity. They are perfect for holiday parties, family gatherings, or just a cozy night in. What’s more, they are versatile enough to be tweaked for various dietary needs, ensuring everyone can enjoy a bite of these festive delights.
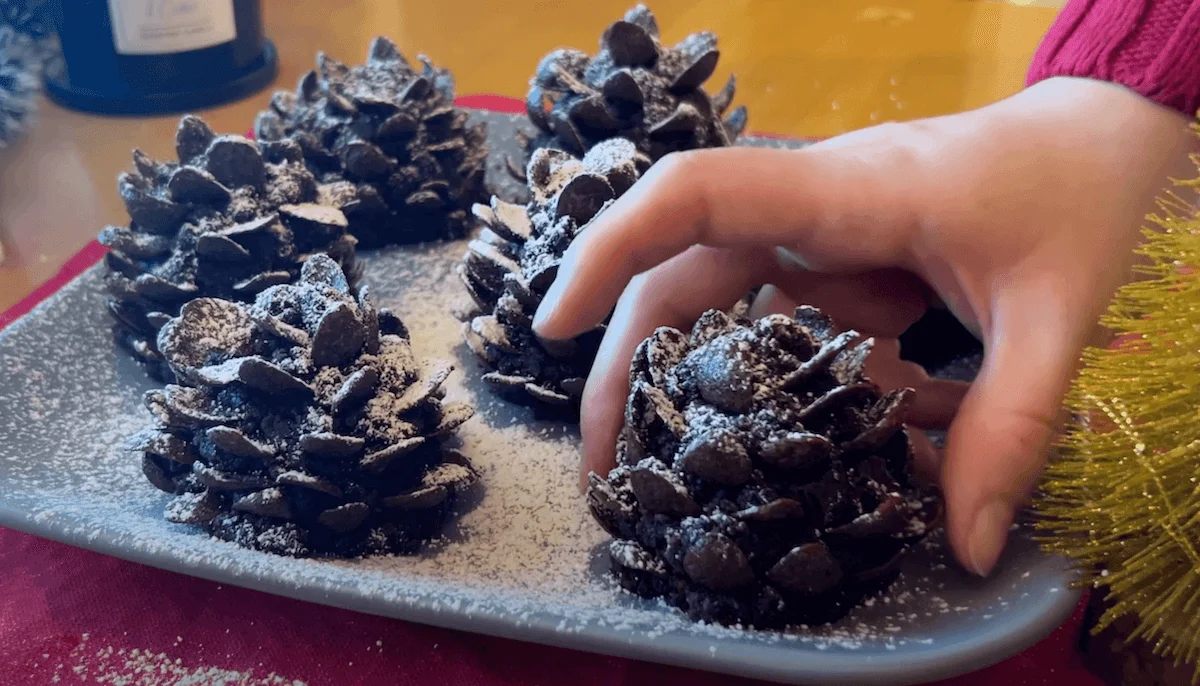
Imagine sitting by the fireplace, a plate of brownie pinecones on the table, looking so delectable with their almond scales dusted with a hint of powdered sugar. The focus isn’t solely on flavor; it’s about forging lasting memories. Each pinecone, a small work of art, brings not only flavors but also smiles.
Moreover, the simplicity of this recipe means that you can whip up these treats with minimal fuss. Whether you are a seasoned baker or a novice in the kitchen, these pinecones are bound to turn out splendidly. Let’s not forget, using the right ingredients, such as the Simple Mills Brownie Mix, can make all the difference, offering a gluten-free option without compromising on taste.
So, why not add a touch of whimsy to your holiday treats? The Brownie Pinecones Recipe isn’t just a dessert; it’s a centerpiece that invites conversation, joy, and maybe a little bit of magic. Shall we embark on this delightful adventure?
Essential Ingredients for Brownie Pinecones
Before we dive into the magic of making these charming treats, let’s gather all the necessary ingredients. Crafting these Brownie Pinecones requires a blend of basic and specific components that combine to create something truly special. Here’s what you’ll need:
- Brownie Mix: For a fuss-free experience, opt for a box of high-quality brownie mix. If you’re leaning towards a healthier or dietary-specific option, the Simple Mills Brownie Mix is an excellent choice, being gluten-free and paleo-friendly.
- Vegan Butter: To keep things plant-based, a good slab of vegan butter will do the trick. Miyoko’s Creamery offers an organic vegan butter that is perfect for baking and gives our brownies a wonderfully moist texture.
- Egg Replacer: For those avoiding eggs, a flax egg or a commercial egg replacer ensures your brownies are deliciously binding without the eggs.
- Sliced Almonds: These are used to mimic the scales of a pinecone. If nuts are a no-go, cereal flakes can be a creative and allergy-friendly alternative.
- Chocolate Chips: Choose your favorite type—dark, milk, or even dairy-free—to melt and drizzle over your pinecones for that extra chocolatey exterior.
- Coconut Oil: This helps thin out the chocolate chips for a smooth, easy coating.
- Powdered Sugar: For a snowy, festive look, sprinkle some powdered sugar over the top. For a sugar-free option, powdered monk fruit works wonders.
Each ingredient plays a pivotal role in bringing the Brownie Pinecones recipe to life, not just adding to the taste and texture, but also to the overall aesthetic. As we mix these together, we’re not just baking; we’re creating a canvas of culinary art that’s as pleasurable to make as it is to eat. Now that we have our ingredients lined up, it’s time to move on to the tools of the trade in the next section.
Equipment Needed
Required Kitchen Tools
Before we embark on our baking adventure, it’s crucial to ensure we have all the right tools at our disposal. Here’s what you’ll need to make your Brownie Pinecones:
- Mixing Bowls: You’ll need a couple of sizes. A large one for the main mix and a smaller one for melting chocolate.
- Measuring Cups and Spoons: Precision is key in baking, so make sure these are handy for measuring your ingredients accurately.
- Baking Sheet: Lined with parchment paper, this will be the stage where your brownie pinecones take form.
- Microwave or Double Boiler: Essential for melting chocolate smoothly without burning it.
- Spatula and Mixing Spoon: These will help you mix your ingredients thoroughly and scrape every last bit of batter.
- Cooling Rack: To let your brownies cool down properly after baking before you start shaping them into pinecones.
Gathering the right equipment is just as important as selecting quality ingredients. These tools not only make the process smoother but ensure that your Brownie Pinecones turn out just as intended. With everything in place, we’re now ready to dive into the enchanting process of creating these delightful treats. Let’s move forward and see how these ingredients come together in the kitchen dance of baking!
Step-by-Step Recipe
How to Make Brownie Pinecones
Now that you have your ingredients and tools ready, let’s walk through the delightful process of making Brownie Pinecones. Follow these steps carefully to ensure your pinecones are as charming and tasty as can be:
| Step | Instructions |
|---|---|
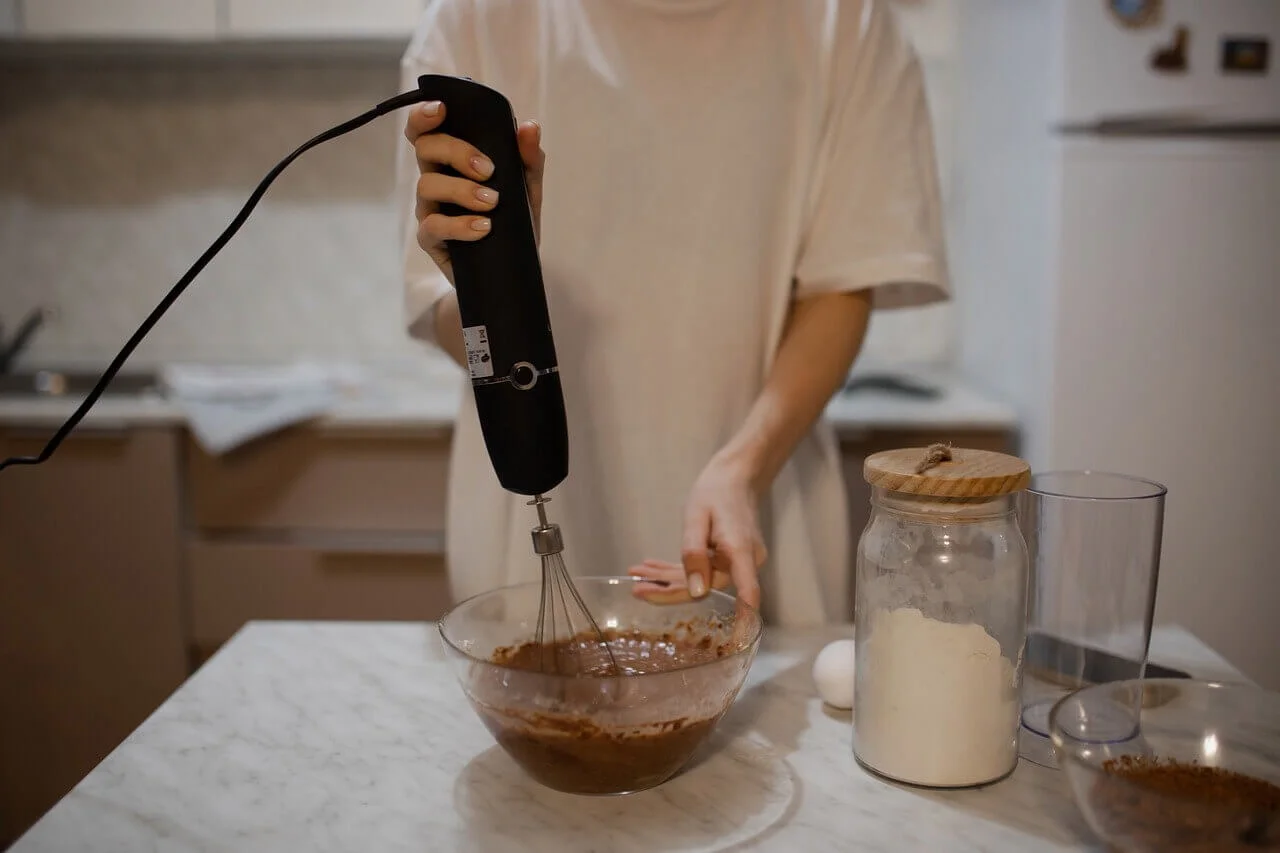
| 1 | Prepare the Brownie Batter: Mix brownie batter according to box instructions, incorporating vegan butter and egg replacer until smooth. |
| 2 | Bake the Base: Pour batter into greased baking dish, avoiding overbaking for a slightly gooey texture. |
| 3 | Shape the Pinecones: Scoop out portions of brownie, mold into oval cone shapes with hands. |
| 4 | Add the Scales: Press sliced almonds or cereal flakes into each brownie cone, overlapping to resemble pinecone scales. |
| 5 | Freeze for Firmness: Place shaped pinecones on parchment-lined baking sheet, freeze for 30 minutes. |
| 6 | Melt the Chocolate: Melt chocolate chips with coconut oil until smooth. |
| 7 | Decorate with Chocolate: Drizzle melted chocolate over pinecones, ensuring coverage of scales. |
| 8 | Dust with Powdered Sugar: Lightly dust each pinecone with powdered sugar for a snowy appearance. |
| 9 | Set and Serve: Allow chocolate to set, then serve as a festive centerpiece. |
There you have it—a step-by-step guide to creating the most adorable and delicious brownie pinecones. Not only are they a joy to make, but they’ll also be a hit with everyone who gets to taste them. Next, we’ll explore the best ways to present and enjoy your freshly made treats.
Visual and Taste Description
What to Expect from Your Brownie Pinecones Recipe
After mastering the art of making Brownie Pinecones, let’s pause for a moment to appreciate the visual and gustatory delights they offer. These treats are a feast for the eyes and the palate, perfect for elevating any holiday spread.
Visual Appeal: Each brownie pinecone is a miniature work of art. The almond or cereal flake scales provide a rustic yet elegant look that mimics the natural beauty of real pinecones. When dusted with powdered sugar, they take on an enchanting, wintry appearance that can charm anyone at your table. Their unique shape and decoration are sure to spark conversations and admiration.
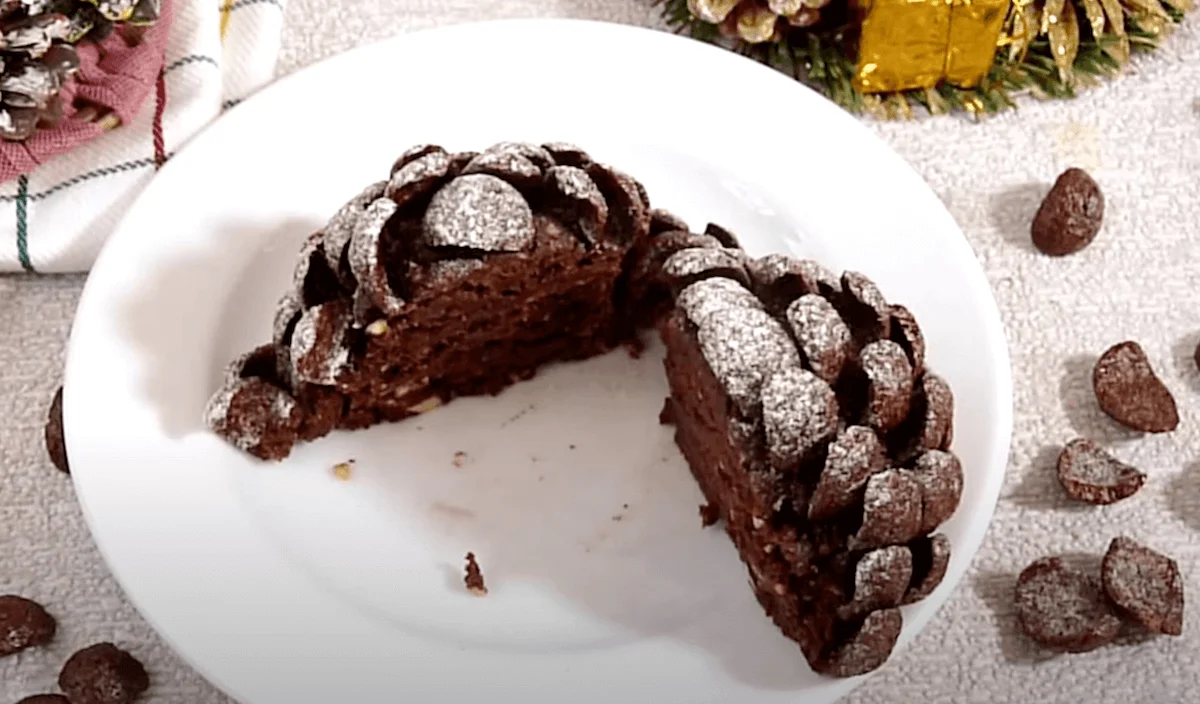
Taste Experience: As for taste, expect a rich chocolate flavor that melds beautifully with the crunchy texture of the almonds or cereal flakes. The gooey center of the brownie contrasts delightfully with the crisp outer layers, creating a multi-textural experience that is both satisfying and indulgent. Whether you opt for dark, milk, or dairy-free chocolate, the coating adds a smooth finish that complements the robust chocolate base.
These Brownie Pinecones are not just desserts; they are sensory experiences that bring joy through their appearance and taste. Now, let’s delve into the nutritional aspects, to understand better what each bite entails.
Nutritional Information
Health Considerations
While indulging in these delightful Brownie Pinecones, it’s also good to be aware of their nutritional content. Here’s a breakdown to help you enjoy them mindfully:
- Calories: Each pinecone varies in calorie content based on the size and specific ingredients used, but generally, a standard-sized brownie pinecone would range from 150 to 250 calories. This makes it a decently indulgent treat that can fit into a balanced diet as a special holiday dessert.
- Fats: Using ingredients like vegan butter and coconut oil provides a source of fats that are considered healthier than traditional saturated fats. The almonds also add healthy fats, which are beneficial for heart health.
- Sugars: The use of natural sweeteners or sugar alternatives like powdered monk fruit helps reduce the refined sugar content, making these treats a bit friendlier for those monitoring their sugar intake. However, the chocolate and brownie mix may still contribute sugars, so it’s worth considering if you prefer a less sweet option.
- Proteins and Fibers: Almonds provide a good source of protein and fiber, which are essential for a balanced diet. Using a brownie mix like Simple Mills, which often includes nut flours, can also add to the fiber content, aiding in digestion and satiety.
- Allergens: It’s important to note that while substitutions for common allergens like eggs and dairy are available, those with nut allergies need to take caution with the almonds or opt for cereal flakes as suggested.
Understanding these nutritional elements allows you to appreciate the brownie pinecones not just for their festive appeal but also for their place within a healthy, celebratory diet. Next, we’ll look into how best to store and serve these treats to keep them fresh and delicious.
Storage and Serving Suggestions
Best Practices
Once you’ve created your delightful Brownie Pinecones recipe, proper storage and serving can make all the difference in maintaining their quality and taste. Here are some tips to ensure your treats stay fresh and are presented beautifully:
-
Storage:
To keep the brownie pinecones fresh, store them in an airtight container. They can be kept at room temperature for a couple of days; however, if you’re not planning to serve them immediately, you can refrigerate them for up to a week. For longer storage, freezing is an excellent option. Just wrap each pinecone individually in cling wrap and freeze. Allow it to thaw naturally at room temperature for several hours prior to serving.
-
Serving:
When ready to serve, allow the brownie pinecones to reach room temperature if they have been refrigerated or frozen for optimal flavor and texture. Arrange them on a festive platter or a decorative cake stand to enhance their visual appeal. A light dusting of powdered sugar just before serving can mimic a fresh snowfall, perfect for a winter holiday setting.
-
Pairing:
These treats pair wonderfully with hot beverages. Serve them alongside a cup of hot cocoa, warm apple cider, or a steaming mug of coffee. The warmth of the beverage complements the gooey, chocolatey texture of the pinecones, making for a cozy, comforting experience.
-
Decoration:
To elevate your presentation, consider adding a few holiday-themed decorations to the serving platter, such as sprigs of holly or a scattering of edible glitter. This can turn your dish into a festive centerpiece that not only tastes delicious but also captures the essence of the holiday season.
By following these storage and serving suggestions, you can ensure that your Brownie Pinecones are not just a treat to eat but also a highlight of your holiday decor. Enjoy the process of making, serving, and sharing these unique and tasty desserts!
Variations and Modifications
Customizing Your Brownie Pinecones
Creativity in the kitchen is not just about following recipes—it’s also about making them your own. Here are some variations and modifications you can try with your Brownie Pinecones to cater to different tastes and dietary needs:
-
Flavor Variations:
- Spice it up: Add a sprinkle of cinnamon or a pinch of nutmeg to the brownie mix to introduce a warm, spicy note that’s perfect for the holidays.
- Minty Fresh: Mix in some peppermint extract to the chocolate coating for a refreshing twist that pairs wonderfully with the rich chocolate.
-
Decorative Twists:
- Colorful Toppings: Before the chocolate sets, sprinkle some colored sugar or edible glitter for a festive look.
- Theme Decorations: Use small edible decorations like sugar pearls or star-shaped sprinkles to make the pinecones fit specific holiday themes or color schemes.
-
Dietary Adjustments:
- Vegan All the Way: Ensure all ingredients, including the decorations and coatings, are vegan. Many stores offer vegan-friendly sprinkles and edible glitters.
- Sugar Control: For those watching their sugar intake, opt for sugar-free chocolate chips and use a natural sweetener in the mix. Adjusting the amount of sweetener can help maintain the flavor while reducing overall sugar content.
-
Texture Enhancements:
- Nutty Crunch: If allergies aren’t a concern, try mixing different types of nuts for varied texture and flavor. Hazelnuts or pecans can offer a delightful twist.
- Fruit Infusions: Add dried cranberries or cherries to the mix for a burst of fruity flavor that complements the chocolate perfectly.
These variations not only allow you to adapt the recipe to different preferences and requirements but also encourage you to experiment and have fun with your holiday baking. Each modification offers a way to personalize the Brownie Pinecones recipe, making them even more special for those who share in the festive treat.
By exploring these customizations, you ensure that your brownie pinecones delight all palates and fit any occasion, making them a versatile and welcome addition to any festive gathering. So, why not experiment a little? After all, every variation is an opportunity to discover a new favorite!
Frequently Asked Questions
As you embark on your journey to make delightful Brownie Pinecones, you might have some questions about the process. Below are some commonly asked questions to assist you on your journey:
-
Do you need to soak pinecones before baking?
- For our Brownie Pinecones, there’s no need to soak anything since we’re using edible components to mimic the look of pinecones rather than actual pinecones. This recipe is all about crafting with ingredients like brownie mix and almonds or cereal flakes to create the pinecone effect.
-
What can I make with pine cones?
- Besides the decorative brownie pinecones, real pine cones can be used for a variety of crafts and seasonal decorations. You can paint them, use them in wreaths, or create bird feeders by coating them in peanut butter and birdseed. For culinary purposes, remember that real pine cones aren’t edible, but they can inspire creative baking and crafting projects like this one!
-
How long do you put pine cones in the oven?
- If you’re using real pine cones for crafts and need to sanitize them, baking is a common method. Typically, pine cones can be baked at a low temperature (around 200°F) for about 30 minutes. This helps to open them up and remove any sap, bugs, or debris, making them safer and cleaner for use in your projects.
-
Why do you bake pine cones?
- Baking real pine cones is done primarily for two reasons: to sanitize them and to help them fully open up. The heat from the oven removes moisture, kills potential pests, and melts away sap, making the pine cones cleaner and more suitable for indoor decorations or craft projects.
These FAQs provide valuable insights into both the culinary and craft aspects of working with pinecone themes. Whether you’re baking a batch of Brownie Pinecones for a festive treat or preparing real pine cones for a DIY project. These tips will help you achieve the best results. Enjoy your creative endeavors and the delicious outcomes they bring!
Final Thoughts on Brownie Pinecones Recipe
Creating Brownie Pinecones is more than just baking—it’s about crafting a moment of joy that can be shared with family and friends. With their whimsical shape and scrumptious taste, these treats are sure to bring smiles and warmth to any holiday occasion. Whether you stick to the traditional recipe or explore variations, the process of making these pinecones is an opportunity to infuse love and creativity into every bite.
So, gather your ingredients, summon your inner baker, and prepare to transform simple brownie batter into festive confections that are as fun to make as they are to eat. Happy baking, and may your holidays be filled with all the sweetness and joy that these Brownie Pinecones can bring!


