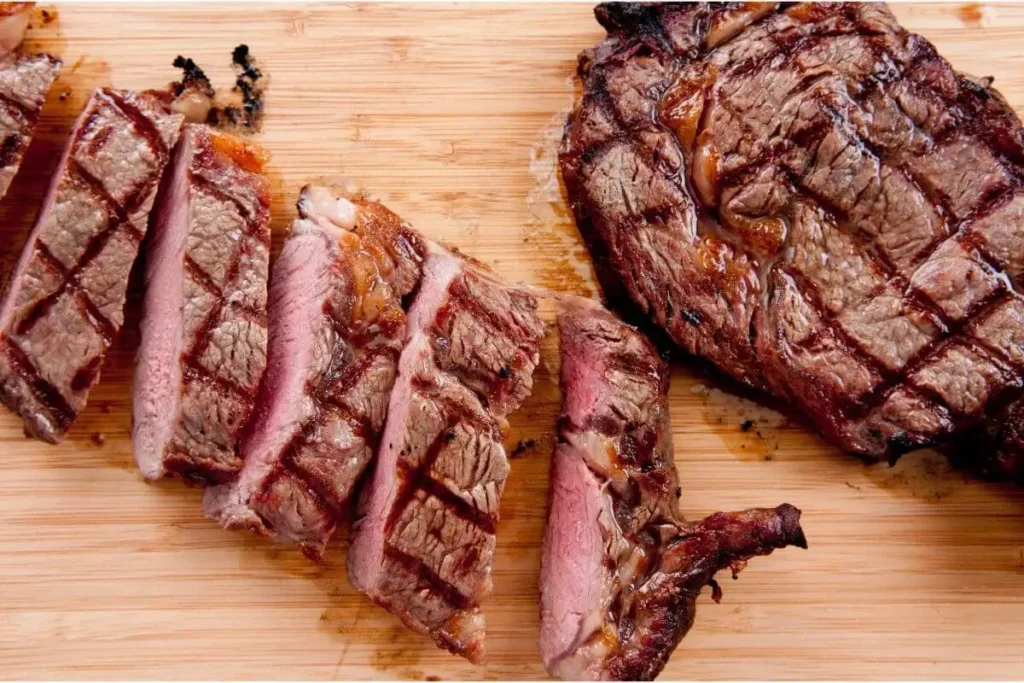
Beef Arm Roast Recipe: Unlock the Secrets to Tender and Flavorful Meals

Welcome to the culinary journey of mastering the beef arm roast recipe. This article is your ultimate guide to unlocking the flavors of a traditional yet sumptuous dish. We explore everything from choosing the best cuts to mastering slow cooking for a tender, flavorful beef arm roast recipe. Whether you’re entertaining or seeking comfort food, this guide guarantees juicy results. So, tie on your apron and get ready to transform your kitchen into a feast of aromas!

Introduction to Beef Arm Roast

What’s the Buzz About Beef Arm Roast?

So, what exactly is a beef arm roast? It’s a scrumptious, hearty cut from the shoulder of the cow, specifically the upper part of the chuck. Known for its rich flavor and satisfying texture, the beef arm roast, or sometimes called the chuck arm roast, is a staple for those who appreciate a good, meaty dish.

This cut includes a significant amount of connective tissue and, often, parts of the arm bone, which contribute to its deep, savory flavor when cooked. Yet, despite its potential, many shy away from cooking this cut due to its reputation for toughness. Fear not! With the right approach, this cut can be transformed into a tender, melt-in-your-mouth delicacy.

Why Opt for an Arm Roast?

Why choose an arm roast over other cuts? First off, it’s budget-friendly without compromising on taste. Secondly, the arm roast’s structure is perfect for slow-cooking methods—think braising or pot roasting—which allows its tough fibers to break down beautifully, resulting in meat that’s both tender and juicy.

Moreover, it’s incredibly versatile. Whether you’re looking to serve it up in slices or shred it for sandwiches, the arm roast offers numerous possibilities. Its robust flavor stands up well to a variety of spices and seasonings, making it a fantastic choice for those who love to experiment in the kitchen.

The Right Cut Makes All the Difference

Choosing the right beef arm roast is crucial. You’ll want a cut that’s marbled with fat as this fat melts during cooking, naturally basting the meat and adding immense flavor and tenderness. A good rule of thumb is to look for a roast that’s evenly thick so it cooks uniformly.

Are you prepared to elevate your cooking skills? Let’s dive deeper into how to select the best ingredients for your beef arm roast recipe in the next part of our guide. And remember, whether you’re a seasoned chef or a novice in the kitchen, a beautiful beef arm roast recipe is just a few steps away from gracing your dining table.

Learn more about beef cuts from the USDA

Selecting the Best Beef Arm Roast

Selecting the Best Beef Arm Roast

Picking the Perfect Piece

When you’re at the butcher or grocery store, the choice of beef can be overwhelming. However, for a stellar beef arm roast recipe, focus is key. Look for a piece that boasts a rich, dark red color. This indicates that the meat is fresh and has been properly handled. Avoid cuts that look dry or have browned edges, as these are signs that the meat has been exposed to air for too long.

Marbling: The Secret Ingredient

Fat is your friend when it comes to a delicious arm roast. The white flecks and streaks of fat throughout the meat, known as marbling, are what give the roast its flavor and juiciness. The more marbling, the better the flavor. This fat will render down during cooking, enveloping the meat in its own succulent juices, so don’t shy away from a cut with a good amount of marbling.

Talk to Your Butcher

Don’t hesitate to strike up a conversation with your butcher. These folks know their meat and can provide invaluable advice on selecting the best cut for your needs. They can also give you tips on how to cook the roast to bring out its best flavors and textures. Additionally, if you have specific dietary preferences or need a particular size, your butcher can help you get exactly what you need.

Understanding Grades of Beef

Beef is graded based on several factors including marbling and age. Common grades include USDA Prime, Choice, and Select. The USDA Prime is the highest quality, with the most marbling, and is often found in restaurants. USDA Choice has less marbling than Prime but is still of high quality and is a great option for roasting. USDA Select has the least marbling and can be a bit tougher, so it may require more careful cooking to tenderize.

Choosing the right grade for your beef arm roast will make all the difference in your cooking. For the perfect balance of quality and price, USDA Choice is often the best option for home cooks looking to create a tender, flavorful roast.

Ready to prep your perfect piece? Stay tuned as we explore the essential ingredients and preparations needed to make your beef arm roast recipe shine in the next installment of our culinary guide.

Preparing Your Beef Arm Roast Recipe

Ready, Set, Marinate!

Marination isn’t just for chicken or fish; it’s a fantastic way to infuse your beef arm roast with extra flavor and tenderize it at the same time. Start by choosing a marinade that complements beef well—ingredients like garlic, rosemary, and black pepper are classics that enhance the meat’s natural flavors. For a bit of zing, why not add some balsamic vinegar or Worcestershire sauce? These ingredients help to break down the meat’s tough fibers, making it more tender.

The Art of Marinating

To get the most out of your marinade, make sure to cover the beef thoroughly and let it sit in the fridge for at least a few hours, or even overnight. The longer the beef marinates, the more flavorful and tender it will become. Just remember to bring the meat back to room temperature before cooking to ensure it cooks evenly.

Searing: Lock in the Juiciness

Before you slow cook your roast, searing it on all sides is a must. This quick, high-heat cook on the surface seals in those tasty juices and gives the roast a beautifully caramelized exterior. Heat some oil in a heavy skillet or frying pan over high heat, and then sear the beef until it’s golden brown all around. This should only take a few minutes per side, but it’s a step that adds a depth of flavor you don’t want to miss.

Season Generously

While marination adds deep flavors, don’t forget to season the roast right before cooking. Use generous amounts of salt and pepper. Salt is crucial as it not only enhances flavor but also helps retain moisture, ensuring your roast doesn’t dry out during the long cooking process. If you’ve already marinated the meat, go easy on the salt since some marinades already contain salty components like soy sauce or Worcestershire.

With your beef perfectly prepped and seasoned, you’re all set to explore the best cooking methods to turn your arm roast into a tender, succulent feast. Stay tuned as we dive into the cooking techniques that will make your roast a standout dish at any dinner table.

How to Cook Beef Arm Roast

Roasting the Beef Arm

Once your beef arm roast is marinated, seared, and seasoned, it’s time to roast. Preheat your oven to a moderate temperature — around 325°F (165°C) is ideal. This lower cooking temperature allows the roast to cook slowly, tenderizing the meat as the heat breaks down the tough fibers and connective tissues.

Creating the Perfect Cooking Environment

Place the roast in a roasting pan or a Dutch oven, ideally with a rack to lift it off the bottom. This setup allows air to circulate around the meat, cooking it evenly on all sides. Add some broth, wine, or water to the pan, which will keep the atmosphere moist and help prevent the meat from drying out. The liquid also adds to the flavor and creates a delicious base for a gravy or sauce.

Cover and Cook

Covering the roast is crucial to prevent it from drying out. If using a roasting pan, cover it tightly with foil or a lid. In a Dutch oven, simply close the lid. Cook the roast for several hours, depending on its size, until it’s tender enough to be easily pierced with a fork. A general rule is to cook it for about an hour per pound, but always check for doneness rather than strictly following the clock.

Alternative Slow Cooking Methods

If you prefer a set-it-and-forget-it method, slow cookers are ideal for cooking arm roasts. Simply place your marinated and seared roast into the slow cooker, add your choice of liquid and set it on low for 8 to 10 hours. Throughout the day, your roast will slowly transform into a tender, pull-apart piece of meat that’s infused with flavor.

Checking for Doneness

To ensure your roast is cooked to perfection, use a meat thermometer to check its internal temperature. For a beef roast, the USDA recommends a minimum internal temperature of 145°F (63°C) followed by a rest time of at least three minutes. This rest period allows the juices to redistribute throughout the meat, making every bite as juicy as the last.

With the roast cooked to tender perfection, the next step is to present it beautifully. Stay tuned for tips on serving and presentation to truly impress your dinner guests with your culinary prowess.

Dishing Out Your Beef Arm Roast

Dishing Out Your Beef Arm Roast

Carving and Serving

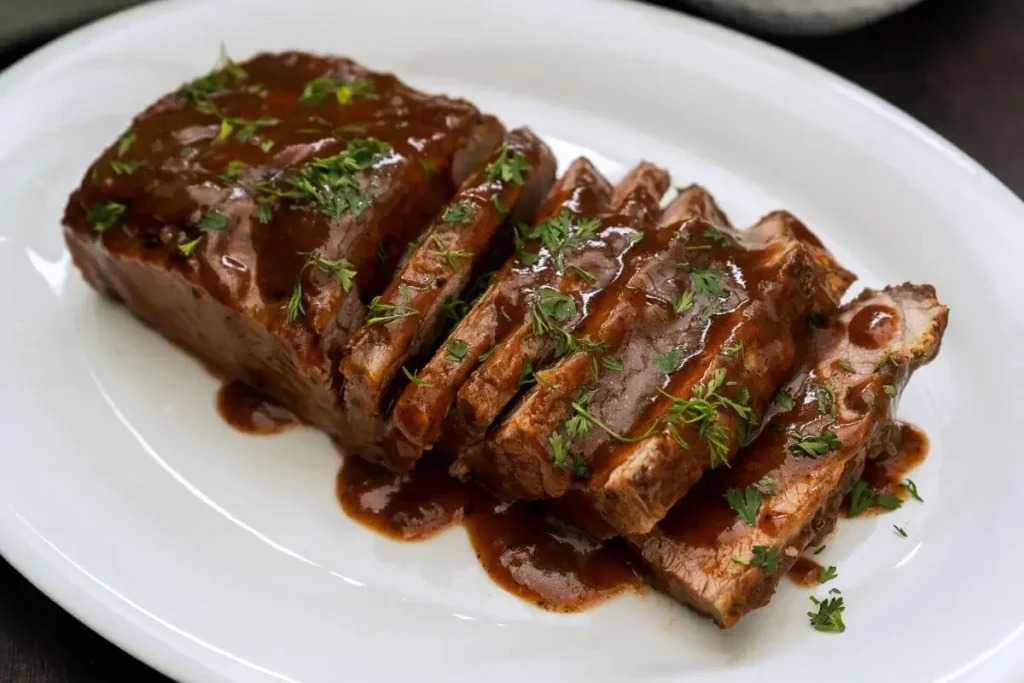
Once your beef arm roast is out of the oven or slow cooker, it’s crucial to let it rest. This isn’t just a pause in the cooking process; it’s a necessary step to ensure that all those delicious juices settle back into the meat. Give it at least 15 to 20 minutes under a foil tent before you carve. For slicing, ensure to use a sharp knife and cut against the grain. This means slicing perpendicular to the muscle fibers, which makes the meat even more tender to eat.

Presentation on the Plate

Visual appeal is nearly as important as taste when serving a dish like a beef arm roast. Arrange the slices neatly on a platter, surrounded by the vegetables that cooked alongside the meat, like carrots, potatoes, and onions. These not only add color and variety to your presentation but also taste delicious as they’ve absorbed the flavors of the roast.

Accompaniments and Side Dishes

To turn your beef arm roast into a feast, consider what to serve alongside it. A rich gravy can be made from the cooking liquids—just simmer them down and thicken with a bit of flour or cornstarch for a perfect complement to the meat. For sides, think about textures and flavors that contrast and complement. Creamy mashed potatoes, crisp green beans, or a fresh salad can balance the hearty, rich flavor of the roast.

Elevating the Meal with Simple Touches

Little details can elevate your beef arm roast from a simple meal to a memorable dining experience. Sprinkle fresh herbs over the platter for a pop of color and freshness, or add a splash of brightness with a squeeze of lemon or a drizzle of olive oil over the vegetables just before serving.

With the beef arm roast beautifully carved and presented, alongside delectable sides and a perfect gravy, your dinner is sure to impress. Up next, we’ll explore how to store any leftovers to keep the deliciousness going for days. Stay tuned as we wrap up our comprehensive guide to mastering the beef arm roast recipe.

Storing Leftover Beef Arm Roast

Proper Storage Techniques

After enjoying a hearty meal of beef arm roast, you’ll likely have leftovers, and the good news is that they can be just as delicious the next day—if stored properly. Transfer any remaining beef and vegetables to airtight containers as soon as they’ve cooled. This prevents bacteria growth and maintains the quality of the food.

Refrigerating Your Leftovers

Leftovers should be refrigerated within two hours of cooking to ensure they remain safe to eat. Stored in the refrigerator, your beef arm roast will keep for three to four days. This short-term storage is perfect for enjoying leftovers during the week, whether it’s in sandwiches, salads, or reheated for a quick dinner.

Freezing for Long-Term Storage

If you have more leftovers than you can eat in a few days, freezing is a fantastic option. Freeze portions in sealed containers or heavy-duty freezer bags. Label each with the date, so you know how long they’ve been stored. Properly frozen, your roast can last for up to three months. When you’re ready to enjoy it again, thaw it in the refrigerator overnight before reheating.

Reheating Leftovers Safely

When it’s time to reheat your beef arm roast, do so thoroughly to ensure it is hot and steaming throughout, reaching an internal temperature of 165°F (74°C) to eliminate any potential bacteria. Use a covered oven-safe dish or a microwave-safe container to maintain moisture and prevent the meat from drying out.

Revitalizing Leftovers

Sometimes, reheated meat can feel a bit dry or less flavorful. To counter this, add a splash of broth or water before reheating to help rehydrate the roast and bring back some of its juiciness. You can also incorporate leftovers into new dishes, such as stews or casseroles, where they can absorb new flavors and textures.

With these tips, your beef arm roast can provide delightful meals for days after the initial cooking. Next, we’ll address some of the most common questions about preparing and cooking beef arm roast in our FAQ section, helping you perfect your technique and enjoy this delicious dish every time.

Frequently Asked Questions

What is a beef arm roast good for?

A beef arm roast is ideal for slow-cooking methods due to its rich marbling and tough muscle fibers. When cooked properly, it becomes incredibly tender and flavorful, making it perfect for traditional roasts, stews, and shredded beef recipes. It offers versatility, making it perfect for family dinners and special occasions alike, used in various dishes.

Can you cook arm roast like a steak?

While technically possible, cooking an arm roast like a steak may not yield optimal results due to its toughness. Instead, it’s best suited for slow cooking methods like braising or slow roasting. These methods help break down the tough connective tissues, resulting in a more tender and juicy piece of meat.

Why is my arm roast tough?

If your arm roast turns out tough, it’s likely due to insufficient cooking time or too high heat. Arm roast contains a lot of connective tissues that require long, slow cooking to break down properly. If rushed or cooked at too high a temperature, these tissues won’t have enough time to tenderize, leaving the meat tough and chewy. Patience is key with this cut!

Is arm roast good for beef stew?

Absolutely! Arm roast is excellent for beef stew. Its rich flavor and the ability to become tender when stewed make it a perfect choice. Cut the roast into chunks and slow cook it with broth, vegetables, and herbs for a delicious and comforting stew that showcases the meat’s flavor and tender texture.

With these FAQs, we hope to have addressed some of the common concerns and curiosities about cooking with beef arm roast. This cut of meat, with its rich flavor and versatile nature, offers many opportunities for delicious and satisfying meals. Both seasoned chefs and kitchen novices can benefit from mastering the art of the beef arm roast.. Enjoy the process and the delicious results!

Mastering the Art of the Beef Arm Roast Recipe

Mastering the beef arm roast recipe offers delicious meals and a rewarding cooking experience. From selecting the perfect cut to understanding slow-cooking methods, each step contributes to succulence and flavor. With the tips outlined, you can transform this tough cut into a tender centerpiece.

When hosting a gathering or preparing a family dinner, the beef arm roast provides versatility and satisfaction. Allow time for tenderizing and flavor absorption, and feel free to experiment with herbs, spices, and cooking methods. Each variation brings a new depth of taste and an opportunity to impress and delight your guests or family members.

As you continue to hone your skills, keep exploring the possibilities that this robust cut offers. With practice, you’ll discover the beef arm roast is more than a dish; it’s a pathway to mastering hearty beef meals. So, keep cooking and enjoy flavorful, tender, and juicy roast beef meals ahead. Enjoy the journey and every flavorful bite!

Leave a Comment